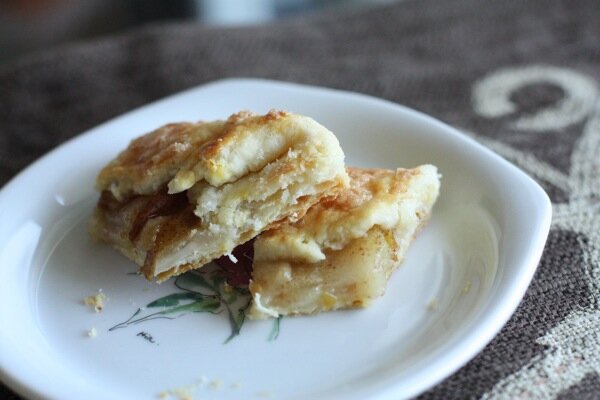
There are few desserts that bring joy to my heart like this one. Simple, beautiful, delicious, and texturally perfect. Ok, maybe I’m getting a little too sentimental about my food- as usual- but hey, that’s what I do!

This dessert takes very little time to make and it can be as neat or rustic as you like. I made it last Friday night when our dear friends Rose and Alessandro had us over for a lovely Italian meal (Alessandro is from Italy, so you can be assured that the meal was amazing!) I had been working all day and knew that I would not have time to make anything too involved. So, I turned to the simplest, most scrumptious dessert I know: a rustic pear tart.

Usually, I prefer my tarts and pies made with apples. However, I came across two beautiful pears at the market on this particular day and knew they would be perfect. Slightly firm, gently sweet and with a gorgeous green skin, the pear slices made the tart an aesthetic and flavorful success.
To be honest, I have not always been a great baker. I used to destroy even the simplest cookie recipe without even trying. Tollhouse? Ruined them. Peanut butter cookies? Ruined them. Ask my parents. It was sad. Fortunately, I have outgrown my miserable baking skills and have finally developed what could be called decent baking skills.
The crust I made for this tart turned out perfectly. I made it totally blind- no recipes or anything- and somehow the stars aligned and I produced something wonderful. A buttery, flaky crust that was as golden and beautiful on the bottom as on the top. I have made the recipe several times and I can confidently say that it is fool proof. Go on- give it a shot!
With the holidays fast approaching, this is a perfect dessert to contribute to the buffet!
Rustic Pear Tart
Makes one 9-inch tart
1 medium pear, any variety, slightly less than ripe, thinly sliced
2 teaspoons cinnamon
1 teaspoon sugar
1 tablespoon lemon juice
pinch of salt
1 cup of flour
1/2 teaspoon salt
1/2 stick of butter (4 T), placed in the freezer for 1 hour
1 tablespoon shortening
zest of half a lemon
1/4 cup ice water
1 egg white, lightly beaten
Sugar for dusting
Start by making the crust. In a large bowl, combine the flour, salt, butter, shortening and lemon zest. If you froze the butter (which I highly recommend) use a cheese grater to grate it into the mixing bowl. This will make it easier to work into the flour and keep the temperature cold. This is a trick of my mother’s that works beautifully! Using your fingers, combine the dry ingredients with the butter and shortening until the mixture resembled small crumbs. Using a teaspoon, slowly add the ice water 1 teaspoon at a time. Do this until the mixture hold together well and is not dry or crumbling. I usually have to use 2, maybe 3 teaspoons, but this can vary depending on climate, etc.
Gather the dough into a ball, wrap with plastic wrap and place in the refrigerator for about half an hour and up to 2 hours.
Meanwhile, take the pear slices, cinnamon, sugar, salt and lemon juice and combine in a bowl. Allow to sit for about 5 minutes but not more than 15.
Remove the crust from the refrigerator. On a floured surface, roll the dough into a large circle, about 13 inches. Transfer the dough to a baking sheet lined with parchment or lightly dusted with flour. Arrange the pear slices as desired on the pie crust. Fold the edges of the dough over the pears to that it covers about 1 1/2 inches to 2 inches. Press lightly on the creases in the dough to ensure it stays laying down.
Brush the edges of the dough with the egg white and sprinkle with extra sugar.
Put the tart in the oven at 350 degrees F (176 C) for about 20 minutes or until the crust is nicely browned.
Serve topped with vanilla, cinnamon or dulce de leche ice cream, whipped cream, or all on it’s own!


Pingback: Food Friday: Lessons from A Rustic Apple Tart « 20 MORE THINGS()
Pingback: New Year’s Eve Menu « Tokyo Terrace()
Pingback: Kabocha Cookies — Tokyo Terrace()